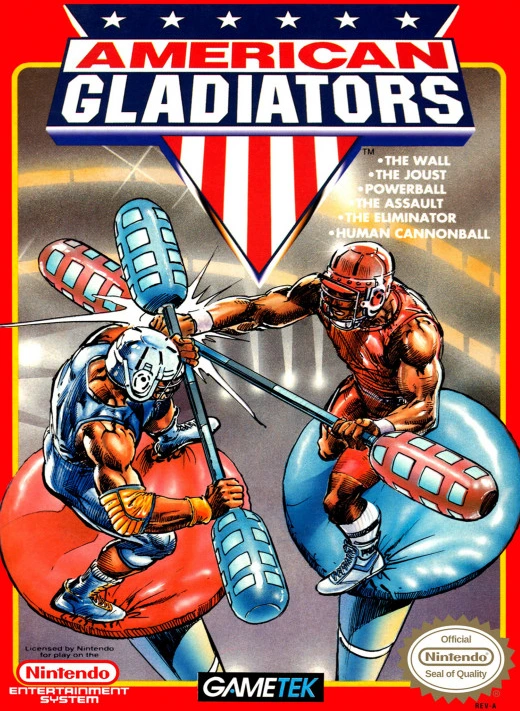
American Gladiators
(For optimum viewing, adjust the zoom level of your browser to 125%.)
Rate:
5 out of 5
Difficulty:
5 out of 5
Played:
11/26
Opinion:
Ah, Steroid er...American Gladiators. I used to watch the show all the time back in the early 90's
and had wanted to be a participant. Then, I got older and forgot all aboout it. Along with tell-all books and
others, the documentary,
Muscles & Mayhem: An Unauthorized Story of American Gladiators,
explains what really went on behind the scenes, exposing the undeniable truth: yep...they were on steroids.
Anyway, I like the NES game, but make no mistake: it's among hardest ever because of the...WALL. Succeeding in
the Eliminator is another tough achievement.
To consider American Gladiators beat, you must complete levels from 1 to 3 separately, which means it's
okay to use the password, and level 4 plus the Eliminator.
Technical Notes
Basic Moves
♦It's better to break them down in each section for five different events: Assault,
Human Cannonball, Joust, Powerball, and Wall.
Events
♦There will be repeats due to four levels: 1, 2, 3, and 4, generating passwords upon the
overall completion of each. The strategies may or may not be different, but there will be changes.
♦The Eliminator will be explained at the end.
♦Lives can be gained and lost, and you'll see the total on the left in the menu of events.
♦You are only able to gain an extra life in three ways: winning a round of Powerball, Human Cannonball
during Levels 2 through 4, and the overall completion of a level.
Difficulty
♦In my opinion, the order of the events from easiest to hardest is: Powerball, Assault, Human Cannonball,
Joust, and Wall.
♦The Eliminator takes the cake for being the hardest of them all.
Passwords
Level 2: ABAAAABB
Level 3: ABAABAAA
Level 4: ABAABBBB
Eliminator: Doesn't exist
Assault: Level 1
What To Do
♦The B button is pick up the missile launcher.
♦The A button is shoot the missile launcher.
♦Each missile launcher you pick up has 3 ammo, and it's cumulative.
♦You win the event if you hit the gladiator three times or make to the finish line in time.
♦Either it takes three hits or the timer runs out for you to lose a life.
♦To be honest with you, you're better off making to the finish line with no regard for the missile
launchers; all you have to do is focus on dodging the balls solely.
Human Cannonball: Level 1
What To Do
♦Remember...every time you fail, you lose a life.
♦The A button is jump.
♦When you jump off the platform (you first want to stand on right of the white center), the goal is to
be at the very bottom of the swinging rope. Assuming this performed as exactly (maybe just a bit above), the
following strategies will work; otherwise, you are on your own:
First Gladiator: Jump when you are almost as level (a bit higher is better than a bit lower) as the
gladiator and AFTER the platform begins to come down.
Second Gladiator: Jump when you are almost as level (a bit higher is better than a bit lower) as the
gladiator and AFTER the platform begins to come down.
Third Gladiator: This is a tricky one. After getting on the rope, wait as you swing over to
the gladiator and then back. Now, jump when you are one notch to the right of the center.
Fourth Gladiator: Jump when you are almost as level (a bit higher is better than a bit lower) as the
gladiator and AFTER the platform begins to come down.
Joust: Level 1
What To Do
♦Remember...every time you fail or fall over after winning a battle, you lose a life. You'll be doing
this a lot at once, but it's actually an easy event.
♦The B button is strike.
♦Combined with UP or DOWN, you hit at the top or bottom, respectively.
♦If the gladiator strikes you in the middle, you hit him back at the top. If top, you go bottom. If
bottom, you go middle.
♦Everybody reacts differently. Therefore, the following strategies will work:
First Gladiator: Hit the middle repeatedly.
Second Gladiator: Hit the top repeatedly.
Third Gladiator: Hit the middle repeatedly.
Fourth Gladiator: Assuming you don't get the power stick which takes one hit to win, hit the top
repeatedly.
Powerball: Level 1
What To Do
♦Remember...you can't lose a life in this event.
♦The A button is take the ball from the trough.
♦The B button is put the ball in one of the five baskets.
♦When you take a ball from one side and it's either scored or knocked out, you must go to the other
side for the next ball.
♦If you put a ball in all of 5 baskets, you score a 1-Up. Theoretically, it can be done twice within 60
seconds, but I've never been able to do it. Therefore, when you win a round, just take a break, letting the
timer to run down.
Wall: Level 1
What To Do
♦This is the mother of them all. I recommend practicing A LOT for absolute mastery of how you control
yourself because it's going to matter in the long run.
♦To climb properly, use A and B buttons in a back-and-forth fashion.
♦Apart from the usual on the directional pad, you must also master the NORTHWEST, NORTHEAST, SOUTHWEST,
and SOUTHEAST.
♦Anytime you feel fucking up a bit without falling off yet, slowly climb down, and redo it differently.
♦Ignore the timer; focus on how you climb, how to manuever through the difficult parts, and how you avoid
the gladiators.
♦Starting off, go quickly until you reach the horizontal blocks. Where it looks like a "6," this is the
first difficult part to manuever through; practice it well.
♦Afterwards, climb up a bit and wait until the gladiator falls down before proceeding.
♦When you are at the bottom, climb diagonally until you can go straight up and then start making a move
to the right, causing the next gladiator to fall off.
♦Stay on the right side to force the next one to fall off by climbing a bit up and then down.
♦Once done, go above the horizontal block and move to the extreme right before climbing up.
♦When you are midway through the lower portion of the big yellow block on the right side, either wait or
go down diagonally to get the gladiator to fall off.
♦I'm not a fan of grabbing the hand for speed because it'll screw up the climb soon; so, skip it. Now,
go below the yellow block and move to the left side for convenience.
♦If done correctly, just climb diagonally in the middle part and make your way to the top.
Assault: Level 2
What To Do
♦You win the event if you hit the gladiator four times or make to the finish line in time (preferable).
Human Cannonball: Level 2
What To Do
First Gladiator: Jump when you are almost as level (a bit higher is better than a bit lower) as the
gladiator and AFTER the platform begins to come down.
Second Gladiator: Jump when you are almost to the end near the gladiator as he is just standing right
before you.
Third Gladiator: Wait for the power fist to appear and jump to grab it as you get on the rope; don't
rush it. Afterwards, go to the bottom and jump when you are almost as level (a bit higher is better than a
bit lower) as the gladiator and AFTER the platform begins to come down.
Fourth Gladiator: After getting on the rope, climb up to get the 1-UP before going down. Jump when you
are almost as level (a bit higher is better than a bit lower) as the gladiator and AFTER the platform begins
to come down.
Joust: Level 2
What To Do
First Gladiator: Hit the middle, bottom repeatedly.
Second Gladiator: Hit the bottom, top, top repeatedly.
Third Gladiator: Hit the bottom, top, top, middle repeatedly.
Fourth Gladiator: After getting the power stick, hit the bottom exactly. Otherwise, it's bottom, middle,
bottom, top, bottom repeatedly.
♦In case you are not hitting the gladiator effectively, wait for a specific strike from him in order to
reset your pattern.
Powerball: Level 2
What To Do
♦55 seconds this time. Nothing changes; take a break after you receive the 1-Up.
Wall: Level 2
What To Do
♦This is easier compared to Level 1.
♦Starting off, take advantage of the diagonal paths (go as high as possible) to knock off two gladiators
at the top and bottom.
♦Afterwards, you are pretty much home free. Just be careful with the diagonal portions.
♦Whatever you do, do not climb all the way to the top; that's not the finish line. Instead, you have to
go to the far right.
♦Take advantage of the power fist, but don't climb diagonally until it runs out.
♦When you are near the big yellow block, use that and the pink blocks to make the gladiators fall off.
Once done, go straight to the top.
Assault: Level 3
What To Do
♦You win the event if you hit the gladiator five times or make to the finish line in time (preferable).
Human Cannonball: Level 3
What To Do
♦Every time you make past a gladiator, I recommend pausing to take a look at the notes before you're
ready for the next one.
First Gladiator: Jump right away and again when you are at the dead center. It has to be done very
quickly.
Second Gladiator: Move to the right and jump when the platform is almost as high as possible.
Jump when it's three notches to the right of the center. Don't worry about not being able to see the gladiator.
Third Gladiator: Wait for the power fist to appear (be patient) and jump to grab it as you get on the
rope. Quickly afterwards, go to the bottom and jump right away when you are three notches to the right of the
center.
Fourth Gladiator: After getting on the rope to grab the 1-Up and climbing down, count the swings
back and forth fully three times before jumping off at the exact center in the middle of the third swing.
Joust: Level 3
What To Do
First Gladiator: Hit the middle, middle, middle, bottom repeatedly.
Second Gladiator: Hit the middle, middle, top, top, bottom, bottom, bottom repeatedly.
Third Gladiator: Hit the top, top, top, top, bottom, middle, bottom, bottom repeatedly.
Fourth Gladiator: After getting the power stick, hit the bottom exactly. Otherwise, it's bottom, bottom,
top, top, middle, middle, middle, middle, top, top repeatedly (yep...a doozy).
♦In case you are not hitting the gladiator effectively, wait for a specific strike from him in order to
reset your pattern.
Powerball: Level 3
What To Do
♦50 seconds this time. Nothing changes; take a break after you receive the 1-Up.
Wall: Level 3
What To Do
♦This is easy compared to Levels 1 and 2. Don't be concerned about the timer which will run out. That's
not going to take away your life.
♦Skip the power fists; they're not worth it.
♦Starting off, work your way until arriving at the tricky part; you'll know what I mean when you see it.
♦Thereafter, go to the far right very slowly to get two gladiators to fall off from the top.
♦All right...now, line up your body parallel to the pink vertical blocks with your left hand on the
first rock, and press A to have the right hand next to it. Slowly, press UP + B, then UP + A, and
finally LEFT + A. Repeat until you are out of that for good.
♦Take your time on the home stretch, but be careful of the hard-to-see spaces.
Assault: Level 4
What To Do
♦You win the event if you hit the gladiator six times or make to the finish line in time (preferable).
Human Cannonball: Level 4
What To Do
♦Every time you make past a gladiator, I recommend pausing to take a look at the notes before you're
ready for the next one.
First Gladiator: Jump as soon as the swing comes to you and again when you are two notches to the right
of the center.
Second Gladiator: Move to the right and jump right away. Now, wait for a full swing to pass the
gladiator. In the middle of the second swing, jump when it's two notches to the right of the center.
Third Gladiator: Move to the right and count up to 1 before jumping. Don't worry; you'll make it and
grab the power fist at the same time. Afterwards, go to the bottom and wait for two full swings to pass the
gladiator. In the middle of the third swing, jump when you are two notches to the right of the center.
Fourth Gladiator: Don't jump yet at the first sight of the rope; wait for the next one. Then, jump
and get the 1-Up. You'll be going down and seeing the gladiator first. That's the first swing. Wait for two
more full swings. In the middle of the fourth, jump at the exact center.
Joust: Level 4
What To Do
First Gladiator: Hit the top, middle repeatedly.
Second Gladiator: Hit the middle, bottom repeatedly.
Third Gladiator: Hit the bottom, top, middle repeatedly and take your time per strike. Now, just move a
bit to the right slowly and wait for the power stick to appear and then time your jump.
Fourth Gladiator: With the power stick, hit the bottom exactly. Otherwise, it's bottom, top, bottom,
middle, top repeatedly.
♦In case you are not hitting the gladiator effectively, wait for a specific strike from him in order to
reset your pattern. Time is not a factor.
Powerball: Level 4
What To Do
♦45 seconds this time. Nothing changes; take a break after you receive the 1-Up.
Wall: Level 4
What To Do
♦*sighs* I hate this one because it's too long, especially after dying so many times in the Eliminator.
That's why stockpiling lives helps immensely.
♦Starting off, watch for two gladiators from the top and bottom.
♦By the time you move to the left, what happened in the tricky part during Level 3 should serve you
well here; all you have to do is apply common sense in terms of which hand goes where and in what direction.
♦When you make to the vertical columns of purple and green blocks, be alert while climbing diagonally
southwest and then back up to let the gladiator fall off.
♦By the time you see two horizontal rows of purple and green blocks, another gladiator will be coming
soon from the top, so go left and then immediately back to the right.
♦Going above the two horizontal rows of purple and green blocks, there will be two more from the
top and bottom before grabbing the power fist.
♦Once you are all the way to the right where the red pluses are, be ready for two more gladiators coming
from the left.
♦At the dead end right, a final gladiator will be coming for you from the top. Just go up and then down
before moving to the left. Thank goodness it's all over from now on.
♦No matter what, the clock isn't a factor.
Eliminator
What To Do
♦Truly, truly, truly, truly the hardest event of the game, you'll die so many times...promise. This is
going to take a lot of practice. But the good news is: it actually becomes easier over time.
♦Holding the A button for a long time is jump much higher while sustaining it.
♦If you make past any of the following parts but die, not to worry...you'll be placed ahead without
the need of repeating anything previously.
Part One: Orange Balls
♦I recommend practicing the crouch to deflect some of the balls; it'll be useful at times.
♦You may see me going fast; it's because I died so many times that I didn't care over time;
eventually, I got better at it.
♦The first set of green platforms is easy to go through, but the real trouble is the second set. You
have to move as quickly as possible or get sucked into the left side. Same issue for the third set.
♦As for jumping over long range, I like to wait for as long as possible before it's time to go because the
balls are always ready to bounce me off.
♦As soon as you see the hang glider, be patient, and take your time to arrive there.
Part Two: Hang Glider
♦The orange balls will knock you off easily, so be careful by always moving back and forth as much as you
can, sometimes rushing forward.
Part Three: Treadmill
♦This part isn't so bad; just need to press A as hard as you can to jump higher.
♦Take your time before getting ready to jump; the longer you wait, the easier it gets.
♦The only caveat is the second set: just go as high as possible before jumping off to the next treadmill.
Part Four: Hang Glider
♦You are really close; just be careful and stay patient. Keep moving back and forth as much as you can.
Part Five: Diagonal Hang Glider
♦Making to the hang glider, the balls won't affect you anymore.
♦All right...this is very important: on the first descent, jump exactly as soon as your feet touch the
white line.
♦Then, you jump a bit before that.
♦Next one, a bit before that.
♦Next one, a bit before, and so on.
♦The last five, you won't see the glider in front of you; therefore, it becomes a leap of faith.
♦Always remember to jump a bit earlier than before every single time!
♦Congrats.